Publications
 Partners


Cape Town - The price of vehicles in South Africa can be disheartening but there's nothing quite as soul-destroying as turning the key in your ignition and nothing happens.
Luckily, cars often provide symptoms indicating that something is wrong long before the death click leaves you stranded on the highway.
Many motorists may feel that maintaining a car is too difficult but here are simple skills you can master in minutes to ensure your wheels continue rolling.
While it's tempting to purchase car parts at the lowest price beware that you are not compromising on safety. For an out-of-warranty vehicle, you can often buy parts at cheaper prices than dealers charge but buyers beware.
Some headlight bulbs can cost as little as R15 (especially for older vehicles) but they often don't last very long. You should probably walk away from wiper blades being sold for R20 each.
And forget about retreaded tyres, regardless of the price.
To make things easier, we have graded checks according to a 1-5 scale of difficulty, with 5 being the most difficult.
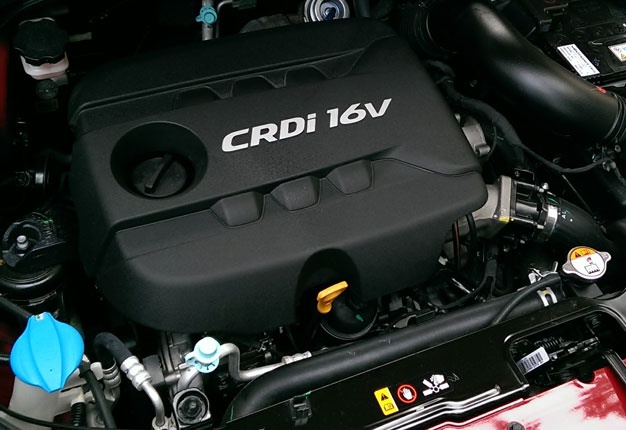
1. Checking your oil
Skill Level: 1
Tools: Old cloth
Time: 20 seconds
Despite the latest technology of modern cars, vehicles still use oil to lubricate engine components and if the oil is low or dirty, it could seriously damage your engine, leaving you stranded along the road.
Luckily, checking the oil is easy on most cars with a simple check via the dip stick, though some models have dispensed with it entirely.
Make sure you check the oil after the engine has run for at least five minutes and that the vehicle is on a level surface.
1. Open the bonnet and make sure it is securely locked.
2. The dip stick will usually be marked "Oil" and yellow.
3. Slide it out gently and wipe the oil off with an old cloth or tissue.
4. Insert the dip stick for a few seconds and remove it again.
5. This time, check the oil markings on the dip stick; oil should ideally be at or slightly below the maximum marking.
6. If the oil is low it's best to have the car checked out at your dealer or mechanic if it's out of warranty.
7. Close the bonnet; make sure it's securely locked.
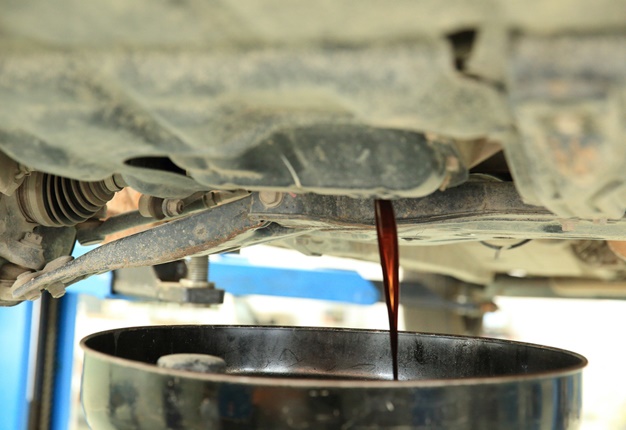
2. Changing oil
Skill level: 2
Tools: Car jack, spanner or socket wrench, new oil filter, oil capture can, new oil, car jack, jack stand
Time: 40 minutes (including breaks)
The key to doing this job - or any car job - is being methodical.
Before you begin, make sure that the engine is warm but not hot. Having it idle for a few minutes should do the job. Make sure that the car is parked on a level surface.
It also helps to locate the oil filter on the engine prior to removing the sump plug.
1. Jack the car up gently and secure it with a jack stand - preferably on the front wheel opposite the sump plug.
2. Position the oil capture can underneath the sump plug and loosen the plug with the socket wrench. The oil will be warm so best not to linger there too long with your hands.
3. (On large capacity engines, more than 5l of oil could drain so ensure that your oil capture can is a match for the vehicle's oil capacity.)
4. While the oil is draining, loosen the oil filter - it should come off with hand power, but if it's tight, use an old wet rag or an oil filter wrench to get it off.
5. Have a coffee break.
6. Once the oil has completely drained, pour a small amount of the new oil around the inlet of the new oil filter and gently screw it on to the fitting.
7. Be sure not to use too much force and it should sit firmly with the rubber seal.
8. Replace the sump plug and lower the car from the jack stand.
9. Open the oil plug on the engine top and pour in fresh oil. The amount of oil that drained should be you guideline.
10. Pause as you consult the oil measurement on the can of new oil and allow the oil settle before you check the dip stick. Do not start the engine.
11. Once the oil mark is close to the 'Full mark' on the dip stick, stop adding oil and wait a couple of minutes to let the oil settle and check again.
12. Start the engine and let it idle for five minutes.
13. Switch off the car and check the oil again. If it's significantly below the Full mark, add some oil, but do not overfill - it will cause the engine to drag and potentially break engine oil seals.
14. Clean any spilt oil, visually check the oil filter and look under the car to ensure no leaks at the sump plug.
15. Close the bonnet and boast about how you saved yourself a visit to a workshop.
3. Changing the battery
There's nothing quite as depressing as turning the key and realizing your battery is flat. If you need to change the battery, here's how as well as a quick test to check your battery.
Skill level: 1
Tools: Spanners
Time: 5 minutes
Make sure the ignition is off before you go anywhere near the battery.
1. Battery terminals are usually covered with a plastic clip. Remove these to gain access to the terminals.
2. The terminals will be marked minus (-) for negative and plus (+) for positive.
3. Ensure you have no metal jewelry hanging from your wrist and remove the negative terminal. Make sure it is secured away from any metal.
4. Repeat the process for the positive terminal.
5. Before you can remove the battery, there will usually be a battery clamp to keep the battery secure in the engine bay. Find and remove the clamp and the battery should be easy to pull out of the car.
6. Once you place in the new battery, reverse the process and don't forget to secure the clamp.
7. Remember to hand in your old battery when you buy a new one as you could receive a discount.
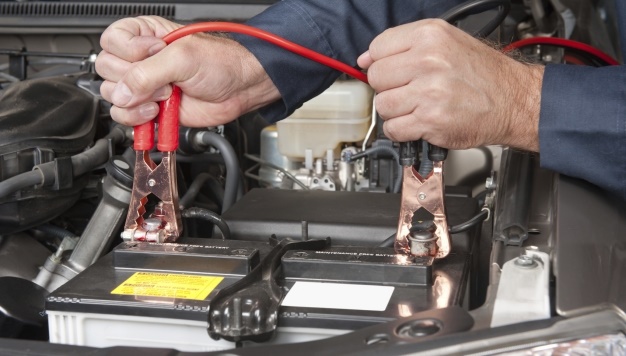
Quick battery test:
1. After taking a drive of about 10km, switch on the headlights without starting the car.
2. After five minutes, the car should still be able to start without any delay from the starter.
3. If the car fails to start, it is likely that the battery is not holding a charge and may need to be replaced.
4. Many auto-electrical operators perform free battery testing.
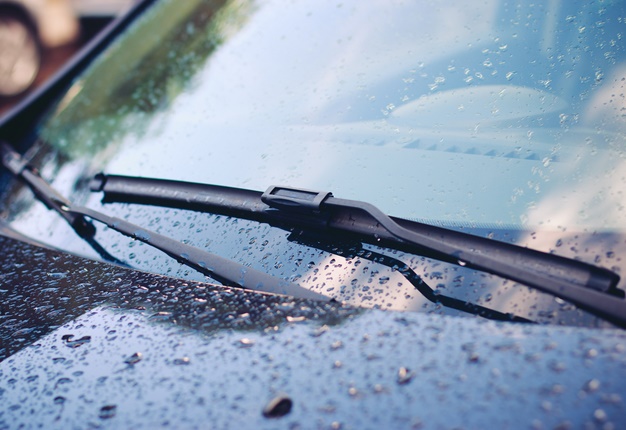
4. Changing your wiper blades
With long, hot South African summers, many motorists forget that when the rain pours wipers perform a key safety function - allowing you to see the road ahead. Worn wipers are highly dangerous.
Skill level: 1
Tools: Just your fingers and new wipers
Time: 5 minutes
1. Make sure that you purchase new wipers of the correct size before removing the worn pair. If you accidentally break them, you have new ones with which to replace them.
2. Raise the wipers off the windshield. On some cars (such as a VW Polo), you will have to set the wipers up before you can raise them and avoid damaging the bonnet.
3. Most wipers have a plastic clip in the middle that you raise.
4. A locking clip can then be slid out and viola, the wiper can be removed.
5. On new models, open the clip and slip them around the metal hook along the wiper arm.
6. Make sure that the plastic clip is secure and it will lock your wipers in place.
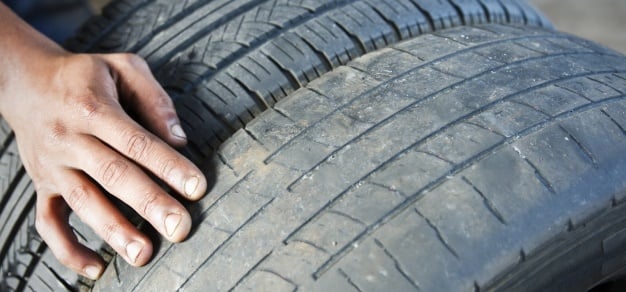
Check your blades: Check you wiper blades by running your finger along the blade to check for a smooth surface. If your wipers are worn or are excessively noisy during use, it's time to replace them.
5. Rotate your tyres
Most modern cars are front-wheel drive and they require tyre rotation so that the tyres wear evenly. Fair warning though, while this job is pretty straight forward, it can be backbreaking work so perhaps schedule some breaks or acquire help from your mates.
Skill level: 3
Tools: Car jack, jack stand, elbow grease
Time: 60 minutes
1. If you have mag-lock nuts, ensure you have the adaptor-lock ready or if you have hub caps, purchase cable ties to secure them to the wheel when you're done.
2. Loosen the wheel studs while the car is parked (with the handbrake deployed) on a level surface.
3. Raise the car via a jack and secure with a jack stand.
4. Remove the wheel studs and take off the wheel. Take the opportunity to check the wheel and tyre for any road damage. Also check the tyre tread to ensure it's safe enough to drive.
5. It doesn't hurt to run your finger over the brake discs - the surface should be perfectly smooth as uneven wear could indicate a brake-pad replacement or brake-skimming due.
Take a break.
6. The right rear wheel moves to the left front and the left, rear wheel should move to the right front.
7. The front wheels needn't be switched when moving them to the rear.
8. Make sure that tyre sizes on both sides of the vehicle are identical and if your car has directional-pattern tyres, only front tyres should move to the rear.
9. Tighten wheel studs lightly before lowering the car and tighten wheel studs in the opposite order you secured them in.
Read the article, now WATCH the video: